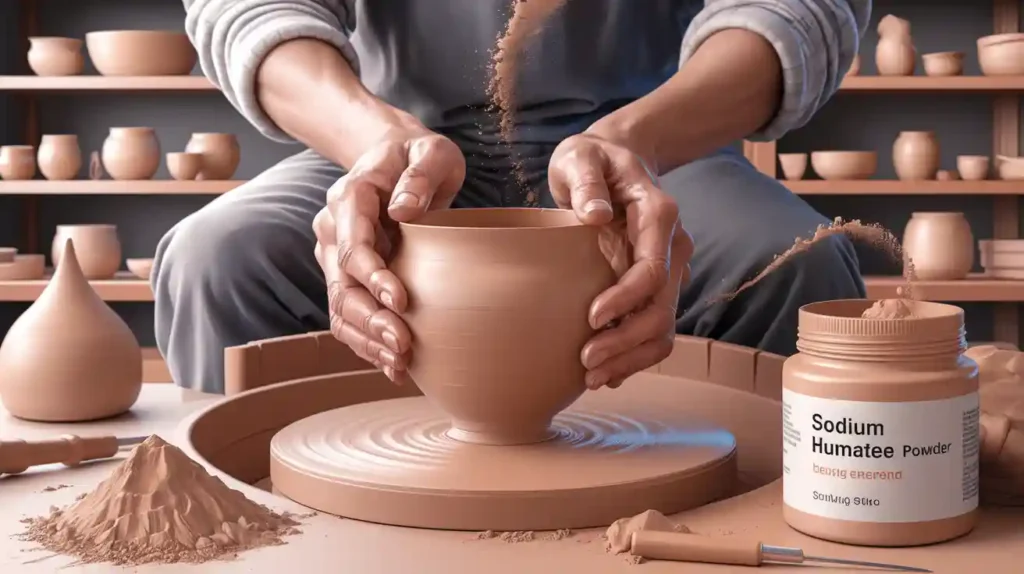
You make ceramics stronger by using sodium humate for ceramic forming reinforcer, which helps spread particles more evenly and modifies surfaces. Sodium humate acts as a powerful dispersant and improves particle adhesion in ceramic mixtures. This makes your products stronger before firing and easier to shape. Incorporating sodium humate for ceramic forming reinforcer prevents cracks and ensures consistent results every time. When you use sodium humate as a ceramic forming helper, you reduce errors and improve the quality of your ceramics. By altering ceramic surfaces and interiors with sodium humate for ceramic forming reinforcer, the materials become more workable. Each time you use sodium humate, your ceramics turn out reliably well.
Key Takeaways
Sodium humate helps spread ceramic particles evenly. This makes the slurry smoother and more stable.
It makes ceramics stronger before firing. It acts like glue and lowers cracks and breakage.
Using sodium humate makes clay easier to shape. It helps stop mistakes and problems.
The right amount is important, usually 0.1% to 0.5%. Too much makes the slurry thick and hard to pour.
Sodium humate helps glaze pastes stay mixed for longer. This stops cracks and tiny holes from forming.
Adding sodium humate to gypsum molds makes them stronger. It also helps the molds last longer.
It makes sagger mud better by helping it handle heat. It also lowers cracks when firing.
Using sodium humate saves water and cuts down on waste. It also helps make things faster in factories.
Technical Mechanisms
Dispersant Action
Particle Distribution
Sodium humate helps spread particles in ceramics more evenly. It sticks to the surfaces of clay minerals like montmorillonite and kaolinite. The organic anions in sodium humate attach to Al–OH spots. This changes the charge on each particle’s surface. The new charge makes particles push away from each other. This stops them from clumping together. When you add sodium humate to your slurry, the mix spreads out better. You see fewer clumps and better mixing. Tests show that sodium humate changes how charges move on the surface. This means sodium humate works right on the particles. Your ceramic slurry becomes smoother and more even. You get the same good results every time.
Slurry Stability
Sodium humate makes the slurry more stable. It does this by making particles push away from each other. This keeps the clay particles from sticking together. The slurry stays mixed for a longer time. Viscosity tests show the slurry flows better and is less thick. This also means there is less chance of the mix settling at the bottom. Your ceramics keep their quality during forming. The better mixing makes the slurry more stable and reliable. This is important for making good ceramics.
Tip: Check your slurry with a viscosity test after adding sodium humate. This helps you find the best amount to use for strong mixing and stability.
Binder and Adhesive
Green Strength
Sodium humate makes your ceramics stronger before firing. It acts as a binder and adhesive. It forms a network inside the slurry. Sodium humate connects with metal cations and water. This makes a gel-like structure. The particles stick together better. Your unfired ceramics are stronger and less likely to break. You can move and handle them with less worry. Viscosity tests show the slurry keeps its shape well. This helps during forming.
Mold Release
Sodium humate helps you remove ceramics from molds more easily. It makes the mixture less sticky. Sodium humate changes how the slurry touches the mold. The slurry does not stick as much to the mold. This makes it easier to take out the formed piece. You get fewer defects and work faster. The surfaces are smoother and the ceramics look better.
Surface Modification
Powder Dispersion
Sodium humate helps spread powder in ceramics better. It changes the powder surface in both chemical and physical ways. When you use sodium humate with a silane coupling agent, the powder’s surface charge increases. This makes the powder spread out more and lowers the viscosity. You mix, stir, and dry the powder to make sure the change is complete. The slurry flows better and has fewer lumps. This makes your ceramics higher quality.
First, mix the ceramic powder with sodium humate and a silane coupling agent.
Stir the mix at higher temperatures to help the change happen.
Wash and dry the powder to get rid of extra chemicals.
Test the slurry to see if it flows better and spreads out more.
Notice that the new powder makes a more stable and easy-to-use slurry.
Rheology
Sodium humate changes how your slurry flows and holds together. It helps the slurry flow better and keeps it from getting too thick. Sodium humate sticks to the particles and keeps them apart. This makes the slurry less likely to clump. At the same time, sodium humate can form weak gels with metal cations. This helps the slurry keep its shape. You can change how much sodium humate you use to get the right flow and thickness. This helps your ceramics have the best mix of easy flow and good structure.
Aspect | Evidence Summary | Implication for Sodium Humate in Ceramic Slurries |
|---|---|---|
Adsorption on Clay Minerals | Organic anions like natural polyanionic humate stick to Al–OH spots on clay minerals (montmorillonite, kaolinite). | This shows sodium humate can change particle surfaces and affect how water sticks to them. |
Colloidal Stability | Sticking increases the push between particles, making them stay apart. | This stops clay particles from clumping, making the slurry stronger and more stable. |
Rheological Behavior (CMC analogy) | CMC, an anionic polymer, makes slurries thicker and more stretchy by forming gels with metal cations. | This means sodium humate may also help as a dispersant and stabilizer, changing thickness and stretchiness by making gels. |
Overall Effect | Organic anions help the slurry flow by stopping clumps but can also make it thicker by forming gels. | Sodium humate likely helps both with spreading and with keeping the slurry together by balancing these effects. |
Sodium humate gives you both better flow and better mixing. This helps your ceramics have the right feel and strength at every step.
Sodium Humate for Ceramic Forming Reinforcer
Strength Enhancement
You want your ceramics to be strong before firing. Sodium humate for ceramic forming reinforcer helps make this happen. It changes the surface of particles and builds a flexible network. When you add sodium humate, your ceramics get much stronger. Sometimes, the strength can be up to 80% higher than normal. This is because sodium humate makes strong links between clay particles. It also changes the way water sits in the clay. Your ceramics become more even and stable.
Note: Always check how much you use. The best results come from using 0.1–0.5 wt.% sodium humate for ceramic forming reinforcer. If you use more than 0.25 wt.%, the slurry might get too thick.
Plasticity Improvement
You need your clay to be easy to shape. Sodium humate for ceramic forming reinforcer helps with this by changing how particles touch each other. It raises the plasticity index. This means your clay is easier to mold and less likely to crack. Sodium humate sticks to the clay and helps it hold water better. The clay flows smoother. You can shape your ceramics with less work and get better results.
Changing the particle surface makes the clay easier to use.
You feel less pushback when shaping the clay.
This also lowers the chance of problems when forming.
Damage Reduction
You want to stop damage to your unfinished ceramics. Sodium humate for ceramic forming reinforcer helps in many ways. It changes the inside of the clay so it is less easy to break. You see fewer cracks and chips when you move or carry your ceramics. It also spreads out stress inside the clay. This means your ceramics can take more pressure before breaking.
Benefit | How Modification Helps | Result for Ceramics |
|---|---|---|
Higher green strength | Stronger bonds between particles | Less breakage |
Better plasticity | Improved water retention | Easier shaping |
Damage reduction | Even stress distribution | Fewer cracks and chips |
Tip: Always watch how thick your slurry is. Too much sodium humate for ceramic forming reinforcer can make it too thick, which makes mixing and shaping harder.
You can trust sodium humate for ceramic forming reinforcer to change your ceramics the same way every time. The way it works helps each batch meet your standards. If you use the right amount and pay attention, your ceramics will be stronger, easier to shape, and less likely to break.
Grouting Mud
Fluidity
You want your grouting mud to move smoothly and fill every space in the mold. Flowability matters for every ceramic process. When you add sodium humate to your slurry, you expect better flowability. However, tests show that potassium humate, which works like sodium humate, does not change the funnel viscosity of the slurry. This means the flowability of your grouting mud stays the same. Even though you do not see a big change in how fast the slurry moves, you will notice other benefits. Sodium humate helps the slurry feel smoother and less sticky. You get a slight boost in lubricity, which makes it easier to pump and pour the slurry. This smoother feel can help you avoid blockages and keep your process running.
Tip: Always check the flowability of your slurry with a funnel test before and after adding sodium humate. This helps you see if the slurry meets your needs for casting.
Water Demand
You want to use less water in your slurry without losing workability. Sodium humate helps you reach this goal. When you add sodium humate, the slurry holds water better. You do not need to add as much water to get the right flowability. This lower water demand means your grouting mud dries faster and shrinks less. You get stronger green bodies and fewer cracks. The slurry stays stable, and you see less filter loss. This means more of your mix stays in the mold, and less water escapes. You save time and materials with every batch.
Less water in the slurry means less drying time.
Lower water demand helps you control the shape and size of your ceramics.
You get better results with less waste.
Dosage
You need to use the right amount of sodium humate for the best results. For grouting mud, most experts recommend a dosage between 0.1% and 0.5% by weight of the dry mix. If you use too little, you may not see much change in the slurry. If you use too much, the slurry can become too thick and lose flowability. Always start with a small amount and test the slurry. Adjust the dosage until you get the right balance of flowability, stability, and water demand.
Dosage (% by weight) | Effect on Slurry | Flowability Impact |
|---|---|---|
0.1 – 0.25 | Good stability, easy flow | Maintains flowability |
0.25 – 0.5 | Thicker, more stable | May reduce flowability |
>0.5 | Too thick, hard to handle | Poor flowability |
Note: Always monitor the slurry as you mix. The right dosage of sodium humate gives you the best flowability and stability for your grouting mud.
Molding Mud
Plasticity
You need your molding mud to be easy to shape and smooth to handle. When you add sodium humate, you notice a big improvement in plasticity. The particles in your clay move past each other more easily. This makes the molding process less stressful and more consistent. You can press, roll, or form the clay with less effort. The improved plasticity means you can create detailed shapes without cracks or rough spots. Your hands or tools glide through the molding mud, giving you better control over the final product.
Tip: If you want to test plasticity, roll a small piece of molding mud into a coil. If it bends without breaking, your mix has good plasticity.
Green Strength
Strong green strength helps your molded pieces hold their shape before firing. Sodium humate acts as a binder in the molding mud. It forms a network that holds the clay particles together. You can move, stack, or trim your molded items without them falling apart. This extra strength reduces waste and saves time. You see fewer chips and cracks during handling. Your molded ceramics stay firm and ready for the next step.
Property | Without Sodium Humate | With Sodium Humate |
|---|---|---|
Green Strength | Low | High |
Damage Risk | High | Low |
Handling Ease | Difficult | Easy |
Mixing
You must mix your molding mud carefully to get the best results. Start by adding sodium humate to your dry clay and other powders. Mix these dry ingredients until the color looks even. Slowly add water while stirring. Watch the texture and stop when the molding mud feels smooth and sticky but not too wet. If the mud feels too thick, add a little more water. If it feels too runny, add more dry mix. Always test a small batch before scaling up.
Use 0.1% to 0.5% sodium humate by weight for best results.
Mix for at least 10 minutes to ensure even distribution.
Let the molding mud rest for 30 minutes before use. This helps the sodium humate work fully.
Note: Consistent mixing gives you molding mud with even plasticity and strength. Always check the texture before starting your molding process.
Glaze Paste
Suspension
You want your glaze paste to stay smooth and mixed. Sodium humate helps keep the glaze even. The particles in the slurry do not settle fast. This means your glaze paste is easy to use. You do not get lumps or rough spots. Sodium humate sticks to each particle’s surface in the slurry. This keeps the particles from clumping together. Your glaze paste spreads better and covers your ceramics evenly.
Tip: Stir your glaze paste after adding sodium humate. You will see the slurry stays mixed longer and does not get thick at the bottom.
Defect Prevention
You want to stop glaze problems like cracks or pinholes. Sodium humate helps by making the slurry work better. When you use sodium humate, the glaze particles spread out more. This lowers the chance of cracks and other flaws. Tests show that using dispersants like sodium humate raises solid content and improves flow time. For example, a slurry with 0.3% sodium lignosulfonate (like sodium humate) has high solid content and a flow time of about 41.79 seconds. When you add other dispersants, the flow time gets even shorter. These changes help your glaze go on smooth and dry without problems. You get a nice finish on every ceramic piece.
Even particle spread in the slurry stops cracks and pinholes.
Better flow time means the glaze covers all of your ceramic.
Fewer problems save you time and cut down on waste.
Dosage
You need the right amount of sodium humate for your glaze paste. Most experts say to use between 0.1% and 0.3% by weight of the dry glaze mix. If you use too little, the slurry may not stay mixed. If you use too much, the slurry can get too thick and hard to use. Always test your glaze paste after adding sodium humate. Check how it flows and stays mixed before glazing your ceramics.
Dosage (% by weight) | Suspension Quality | Application Ease |
|---|---|---|
0.1 – 0.2 | Good | Easy |
0.2 – 0.3 | Very Good | Smooth |
>0.3 | Too Thick | Hard to Apply |
Note: Start with a small amount of sodium humate. Mix and test your slurry before making a big batch. This helps you find the best balance for your glaze paste.
Gypsum Molds
Strength
You want your gypsum molds to be strong. Adding sodium humate makes the molds stronger. Tests show that more sodium humate gives higher compressive strength. It also gives a better elastic modulus. This means your molds can take more pressure and stress. Sodium humate works as a binder. It holds the gypsum particles together tightly. Your molds are less likely to crack or break. Even with heavy use, they stay in good shape. The molds become very hard. They keep their shape and details for many uses.
Tip: Stronger molds help you get fewer defects. You also spend less time fixing broken molds.
Lifespan
You want your molds to last longer. Sodium humate helps your gypsum molds last more cycles. It makes them tougher and more flexible. With sodium humate, flexural strength goes up by about 30%. Tensile strength goes up by around 15%. This means you can use each mold 30–50% more times. You do not need to make new molds as often. You spend more time making ceramics. The molds resist wear and keep working well. This saves you money and keeps your work moving.
Property | Without Sodium Humate | With Sodium Humate |
|---|---|---|
Flexural Strength | Standard | +30% |
Tensile Strength | Standard | +15% |
Usable Lifespan | Normal | 30–50% longer |
Application
You need to use sodium humate the right way for best results. Follow these steps to get strong gypsum molds:
Add sodium humate as a diluent when you make the ceramic slurry for gypsum mold grouting.
Let your porcelain mud slurry hydrate for at least one day before adding sodium humate.
Use less than 0.25% sodium humate of the dry billet mass. This keeps the slurry from getting too thick.
Stir the slurry well after adding sodium humate so it spreads evenly.
Pour the slurry slowly during grouting to stop mold defects.
Keep dirt and other impurities out of the slurry for high quality.
Do not use too much sodium humate. If you do, the glaze can get dark if it does not burn out during firing.
Note: Mixing carefully and using the right amount of sodium humate helps your molds stay strong and last longer.
Sagger Mud
Thermal Resistance
You need sagger mud that can take very high heat. Adding sodium humate to your slurry helps it handle this heat. This is important when firing silicon carbide ceramics. These ceramics need a high melting point. Sodium humate helps the slurry make a thick, even structure. This strong structure keeps your sagger from cracking when the temperature changes fast. You see fewer breaks from thermal shock during firing. The slurry with sodium humate covers each particle. This helps heat spread out more evenly. Your sagger mud stays strong, even after many firings.
Tip: Test your sagger mud in a small batch first. This lets you check if it can handle real kiln heat.
Integrity
You want your sagger mud to stay together and not fall apart. Sodium humate helps the particles stick better in the slurry. When you add it, the slurry forms a tight network. This network holds up under the weight of silicon carbide ceramics. You see fewer cracks and chips in your finished sagger. The slurry also stands up to wear from being used many times. Your sagger mud keeps its shape and supports your ceramics every time.
Stronger bonds between particles mean less breaking.
Better integrity means your sagger lasts longer.
Good slurry quality gives you steady results.
Property | Without Sodium Humate | With Sodium Humate |
|---|---|---|
Crack Resistance | Low | High |
Shape Retention | Poor | Excellent |
Erosion Rate | High | Low |
Dosage
You need to use the right amount of sodium humate in your slurry. For sagger mud, experts say to use 0.1% to 0.3% by weight of the dry mix. If you use too little, the slurry may not hold well. If you use too much, the slurry can get too thick and hard to use. Always start with a small amount and mix it well. Test the slurry for flow and strength before making a big batch. Change the amount if you have trouble with mixing or strength.
Note: Keep your slurry mixed well at every step. This makes sure the sodium humate spreads out and works best in your sagger mud.
Manufacturing Advantages
Cost Savings
You can save money by using sodium humate in ceramics. When you add sodium humate, you use less water in the slurry. This means you spend less on drying and energy. The slurry changes, so you waste less material. You see fewer broken pieces, so you throw away less. Sodium humate helps the slurry flow better, so you need less raw material for each batch. You do not need as many synthetic additives because the slurry is improved. This saves you money and is better for the environment. You also spend less time fixing problems because the slurry stays stable. Every time you use sodium humate, you get more value from your materials and work.
Efficiency
You want your process to work well. Sodium humate makes the slurry easier to use. The slurry is less thick, so it moves through molds and pipes easily. You fill molds faster and see fewer clogs. The slurry does not settle fast, so you mix less. You can shape ceramics faster because the slurry holds together. The slurry comes out of molds quickly, so you save time. You see fewer breaks when you handle the pieces. Sodium humate makes green ceramics stronger, so you can stack and move them safely. The slurry also helps ceramics handle heat better. You finish more products in less time.
Sodium humate spreads particles out, making the slurry thinner and easier to pour.
The slurry changes, so you get fewer mistakes and better ceramics.
Sodium humate helps hold the green ceramics together, making them stronger.
The slurry can handle heat better, so your ceramics are more dependable.
The slurry changes help you use fewer synthetic additives, which is better for the planet.
Tip: Use sodium humate to make your process smoother and faster. You will see better results every time you make a new batch.
Quality
You want your ceramics to be high quality. Sodium humate helps you reach this goal. The slurry changes, so particles spread out evenly. Your ceramics have fewer cracks and smoother surfaces. The slurry stays mixed, so your results are always the same. The slurry also helps glaze pastes stay mixed. You see fewer glaze problems and better coverage. Sodium humate helps ceramics stand up to heat changes, so they last longer. The slurry changes give you strong and reliable ceramics every time. You can count on your ceramics to work well in tough jobs.
Advantage | How Sodium Humate Helps | Result for Ceramics |
|---|---|---|
Even particle dispersion | Slurry surface charge changes | Smoother, no defects |
Stronger green bodies | Binder action in slurry | Less breaking, more pieces |
Better glaze suspension | Slurry flow changes | Fewer problems, better look |
Note: Using sodium humate in your slurry all the time gives you better ceramics and fewer problems when making them.
You get many clear benefits when you use sodium humate for ceramic forming. This additive helps at every step, from clay-water mixes to sagger mud. By changing the surface, you improve flow, strength, and how things stick together. You see fewer problems and your ceramics dry faster. The table below shows how sodium humate helps in each area:
Application Area | Key Benefits and Effects | Recommended Dosage (%) |
|---|---|---|
Clay-Water System | Flow, dispersion, molding index | N/A |
Porcelain Billet | Strength, density, shrinkage | N/A |
Grouting Mud | Fluidity, moisture, defects | 0.125–0.3 |
Molding Mud | Strength, damage, drying | 0.15–0.3 |
Glaze Paste | Viscosity, milling, shrinkage | 0.01–0.07 |
Gypsum Molds | Flexural, tensile, lifespan | N/A |
Sagger Mud | Flexural, moisture, breakage | N/A |
You get steady results, save money, and make better ceramics. Pick sodium humate if you want your ceramics to turn out great every time.
FAQ
What is the main benefit of using sodium humate in ceramics?
Your ceramics get stronger and easier to shape. Sodium humate helps spread out the particles and makes them stick together. This means your pieces are less likely to crack or break before firing.
How much sodium humate should you add to your ceramic mix?
Use between 0.1% and 0.5% by weight. Start with a small amount and test your mix. If you use too much, your mix can get too thick.
Can sodium humate replace other additives?
You can use less or even skip some dispersants and binders. Sodium humate often works better than man-made additives. Always test your recipe first to make sure it works.
Does sodium humate affect the color of ceramics?
Sodium humate might make your mix darker if it does not burn away during firing. Use the smallest amount that works to help keep the color the same.
Is sodium humate safe to handle?
Wear gloves and a mask when working with powders. Sodium humate is not very toxic, but the dust can bother your skin or lungs.
Will sodium humate help with glaze defects?
Yes. Sodium humate helps the glaze stay mixed and flow better. You will see fewer pinholes and cracks in your glaze after firing.
Can you use sodium humate in all ceramic processes?
You can use sodium humate in grouting, molding, glazing, and sagger mud. Change the amount you use for each process to get the best results.
Tip: Always test a small batch before making a lot. This helps you find what works best for your ceramics.